Add a ChaosHost Exchange Account to your Android device for Over-The-Air
synchronization
If you find these instructions don't match up with the screens you see on
your Android device, keep in mind that each device can be a little different. The basics are
the same on all of them, though, so we hope there is enough info provided here to help
you setup your device right the first time!
Please plug your phone into a power supply when doing your initial sync! It is
not a requirement, but the very first transfer will be sending enough data that
most users will notice considerable battery drain. A Wi-Fi connection is also
preferred, if available, for its superior transfer speeds.
Step 1. Enable Sync and Configure Options and Time Zone Settings
To successfully transfer your appointment data with correct times, you need to
select a default Time Zone for your database on ChaosHost.com. You will also
want choose the same time zone you use on your device to ensure that all the appointment
start and end times come to your device as they should. WARNING: If
you change the time zone on your device, it will change all of the start and end
times on your appointments! If you want the start times and end times to continue
to match what you see on ChaosHost.com and in Time & Chaos/Chaos Intellect,
the time zone on your phone must match!
On the ChaosHost.com website:
- Login to your account on ChaosHost.com, and go to Options.
- Select "Change Over-The-Air Mobile Sync Preferences".
- On "Enable", choose True.
- Select a Timezone for your database. Timezones are listed by Continent,
so Canada, Mexico and the United States would all be considered America, for
example.
- The other preferences are optional, but useful if you have extremely large
databases. If you have more than 2000 contacts, consider synchronizing one group
instead of all contacts. If you have more than 2000 future appointments, make
the window for future appointments shorter by sending just the next few months
of future appointments rather than the defaults.
- When complete, SAVE your settings.
Step 2. Add a new account to your device
- Go to Settings.
- Go to Accounts and Sync.
- Add a new account.
- Choose "Corporate" or "Exchange ActiveSync" for the
type of account.
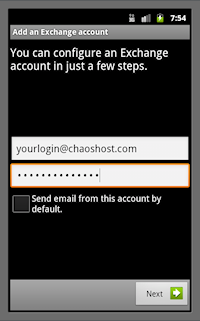
- For email address, fill out the email address using your loginname for chaoshost.com
as if it were a real email address. (i.e. loginname@chaoshost.com)
- For password, enter the same password you use to access your ChaosHost.com
account.
- Uncheck the option if you see it to send email from this account by default.
- Click Next.
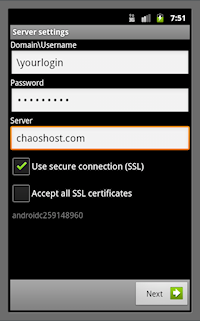
- It is normal for the Domain\Username field to have a "\" in front of your
login name. This login name should also be the same as what you use to
login to ChaosHost.com directly and should not be the fake email address used
the in the previous step.
- If manual settings are necessary, the actual server name for synchronization
is www.chaoshost.com and Use secure connection (SSL) is recommended.
- Click Next.
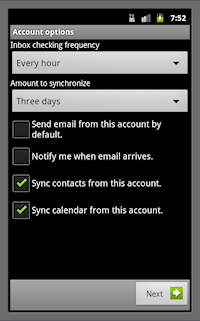
- Turn OFF the options for send mail from this account by default and for
notify me when email arrives. There is no email activity on this account so
both of these options are unnecessary and could cause problems if left on.
- Sync contacts and Sync calendar are both recommended and it is these two
checkboxes that allow your Android device to sync this information with your
ChaosHost account.
- Before you hit next, take a look at the first line for the frequency.
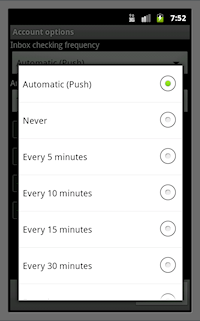
- DO NOT leave this on Automatic (Push)! It will kill your battery life
and will cause constant syncs with ChaosHost every few seconds. Instead, take
a look at your options for another choice that better fits your needs.
This choice is selecting how often your device will look in the background for
updated Contacts or Calendar entries, so most users can set this to every hour
or longer.
- If you select Never, it will not sync in the background at all, BUT, you
can return to your account settings and have it sync on demand just when you
want it to. While you would have to remember to do this periodically to
keep your device up to date, it is the best setting to preserve battery life.
- Once you have fixed the frequency, click Next.
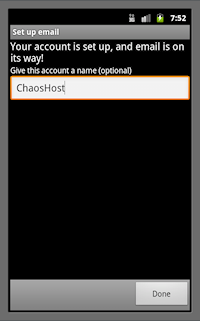
- Most devices give you one final step, which is to choose a nickname for
your account. We recommend calling it ChaosHost to help remind you where this
data is coming from.
The first sync can take a while, depending on how large your db is, so you might
want to make sure you have time to let it run for awhile AND that you have a way
to power the device so its not running down your battery. Having Wi-Fi enabled is
also a good idea if it is available. Future syncs are faster once it gets past the
initial load.
Step 3. Is the ChaosHost account your default account?
Android-based devices can have multiple sources for your data. If you setup more
than one source, you'll want to be careful which sources are enabled to avoid
your device looking as if it has duplicate entries. When you add new records
to your device, you will also have a choice as to which online account the data
should be transmitted to.
This help article applies to
ChaosHost,
a cloud database service for users of Chaos Intellect, Time & Chaos, and Chaos
Free